|
|
|
|
| Type: |
PzKpfw VI-I Tiger |
Armament: |
88mm |
| Built: |
Oct 2008 |
Armor: |
100mm |
| Builder: |
Brad Browne |
Rating: |
40/4 |
| Status: |
Rolling Chassis |
Battles: |
0 |
| Owner: |
Brad Browne |
Points Earned: |
0 |
| Call Sign: |
unknown |
Points Given: |
0 |
| Notes: |
| |
Welded 1" steel tube, plywood sheathingM01 Motors, C6C and MR-80 controllersRoller chain tracksIndependent torsion bar suspensionRide-in tank for son
|
|
|
|
|
Click Photo For Enlargement (49 Kb)
|
|
|
|
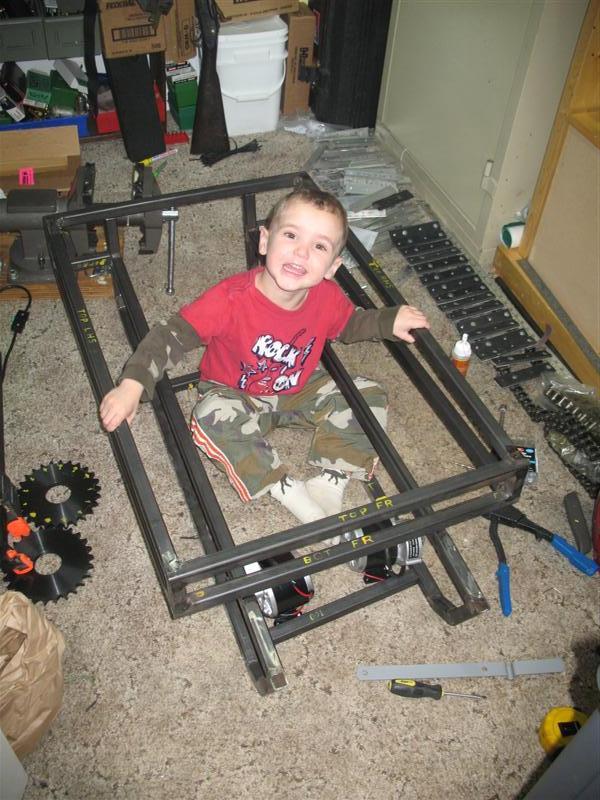
Designed to be large enough for my son to ride in, the Tiger starts to take shape, complete with drivers seat.
|
|
|
|
|
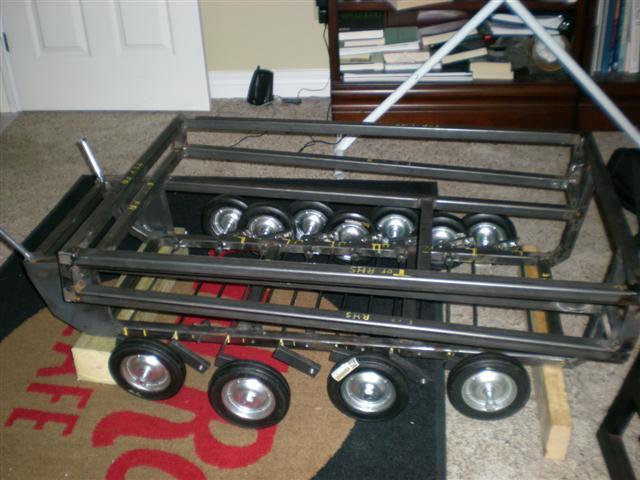
Here's the initial layout, with the starboard side lower hull shown. You can see the roller chain I'm using. |
|
|
Click Photo For Enlargement (53 Kb)
|
|
|
|

Click Photo For Enlargement (57 Kb)
|
|
|
|
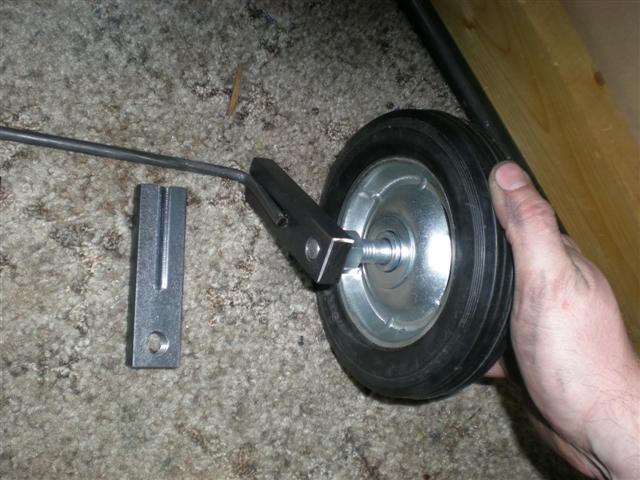
Here's one of the swing-arms and the torsion bar, with the wheel fitted. |
|
|
|
|
Overhead shot showing the initial concept for the layout of the suspension arms. Ended up that the holes were too close, so I needed to re-drill them and add a bit of space. Meant that in the end, I lost a roadwheel. This was partly due to using two references for the design, one was a set of blue-prints from the Internet, the other being a 1/25th scale Tamiya Tiger 1.
Lesson learned, use a single reference. It meant I was missing 1.5" from my lower hull. |
|
|

Click Photo For Enlargement (52 Kb)
|
|
|
|

Click Photo For Enlargement (58 Kb)
|
|
|
|
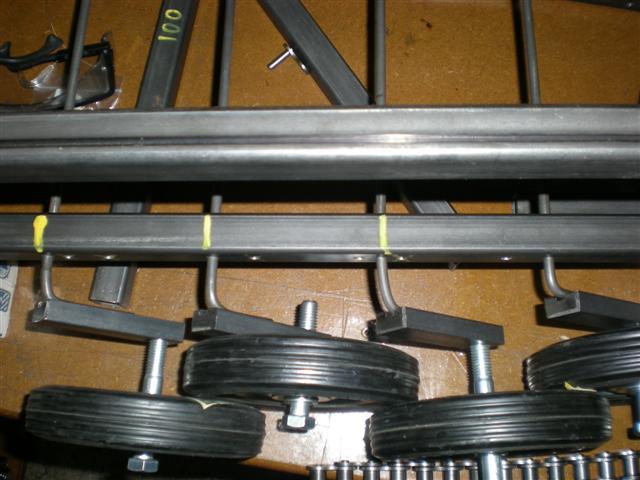
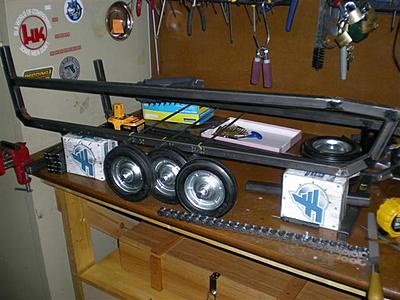
Here is the complete pile of parts for the suspension. I used the bottom 3 as the "trial" assembly pieces. You can see the locking nuts on the left side, those end up being welded to the frame, and a flat gets ground onto the torsion bar so that there's a spot for the bolt to hold.
|
|
|
|
|
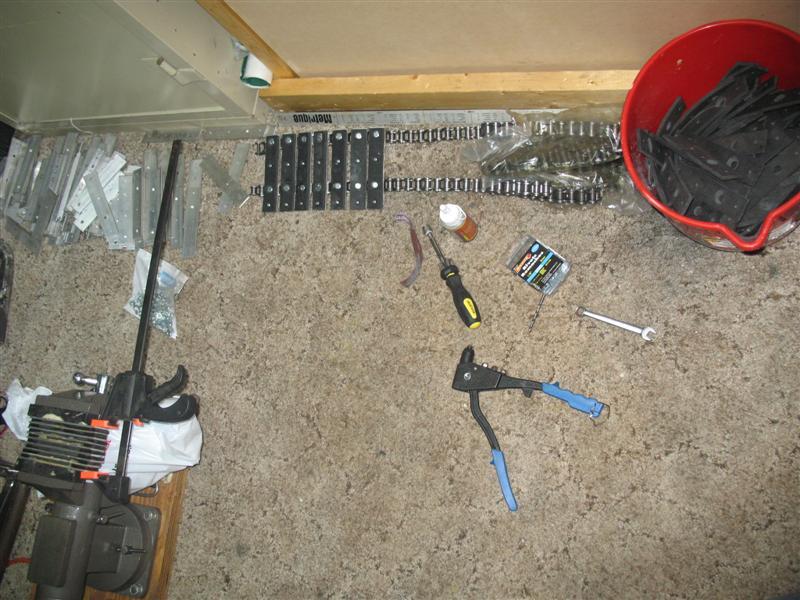
The beginnings of the track. I had a look at Doug Conn's Tiger, and copied a bunch of stuff from his. Alas, the tabbed roller attachment chain was not available for me at less than thirty dollars a foot, so I went with regular roller chain, which meant I had some more work to do with the sprockets...you'll see that coming up shortly.
This sums up the track building process nicely though.
At the top left, you can see the pile of drilled aluminium plates, top right you can see the bucket of rubber pads. In the middle, you can see the riveter and the glue I used to attach them together, and the bottom left you can see the vise and clamp I used to hold them while the glue dried. At the top you see the assembled track. |
|
|

Click Photo For Enlargement (93 Kb)
|
|
|
|

Click Photo For Enlargement (96 Kb)
|
|
|
|
Here's the young and very pleased Panzer Commander. You can see the steady progress on the track on the right, and the pair of sprockets on the left. My original plan was to have the motors as shown in this image, but they moved around as I worked. |
|
|
|
|
Here's the tank bits laid out for reference...my Dad dropped in and wanted to see it. |
|
|

Click Photo For Enlargement (42 Kb)
|
|
|
|

Click Photo For Enlargement (55 Kb)
|
|
|
|
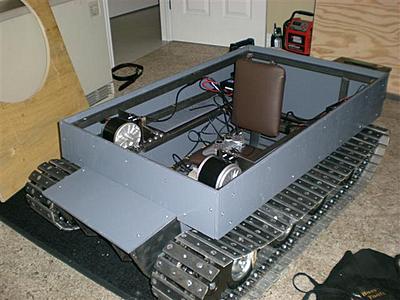
Here's the setup with the frame finally all welded up, and the suspension fitted for the first time. The local wheel supplier was out of stock (for some strange reason) so I was short the last 3 wheels. |
|
|
|
|
|
|